Option 1: Use Your Own Voiceover Script (General Script Mode)
Use this mode when you already have a written script (monologue or narration) that the AI should voice over and visualize. 🔘 Toggle: General Script (default ON)
- Click Upload Your Own Script.
- Set the Language from the dropdown.
- Paste your script into the text area.
- Choose a Scene Pace:
- Slow → Change scene every 15–20 words
- Medium → Change scene every 10–15 words
- Fast → Change scene every 5–10 words
Option 2: Write a Custom Screenplay (Screenplay Mode)
Enable this if you want control over specific scenes, characters, dialogue, and visual actions. 🔘 Toggle: Screenplay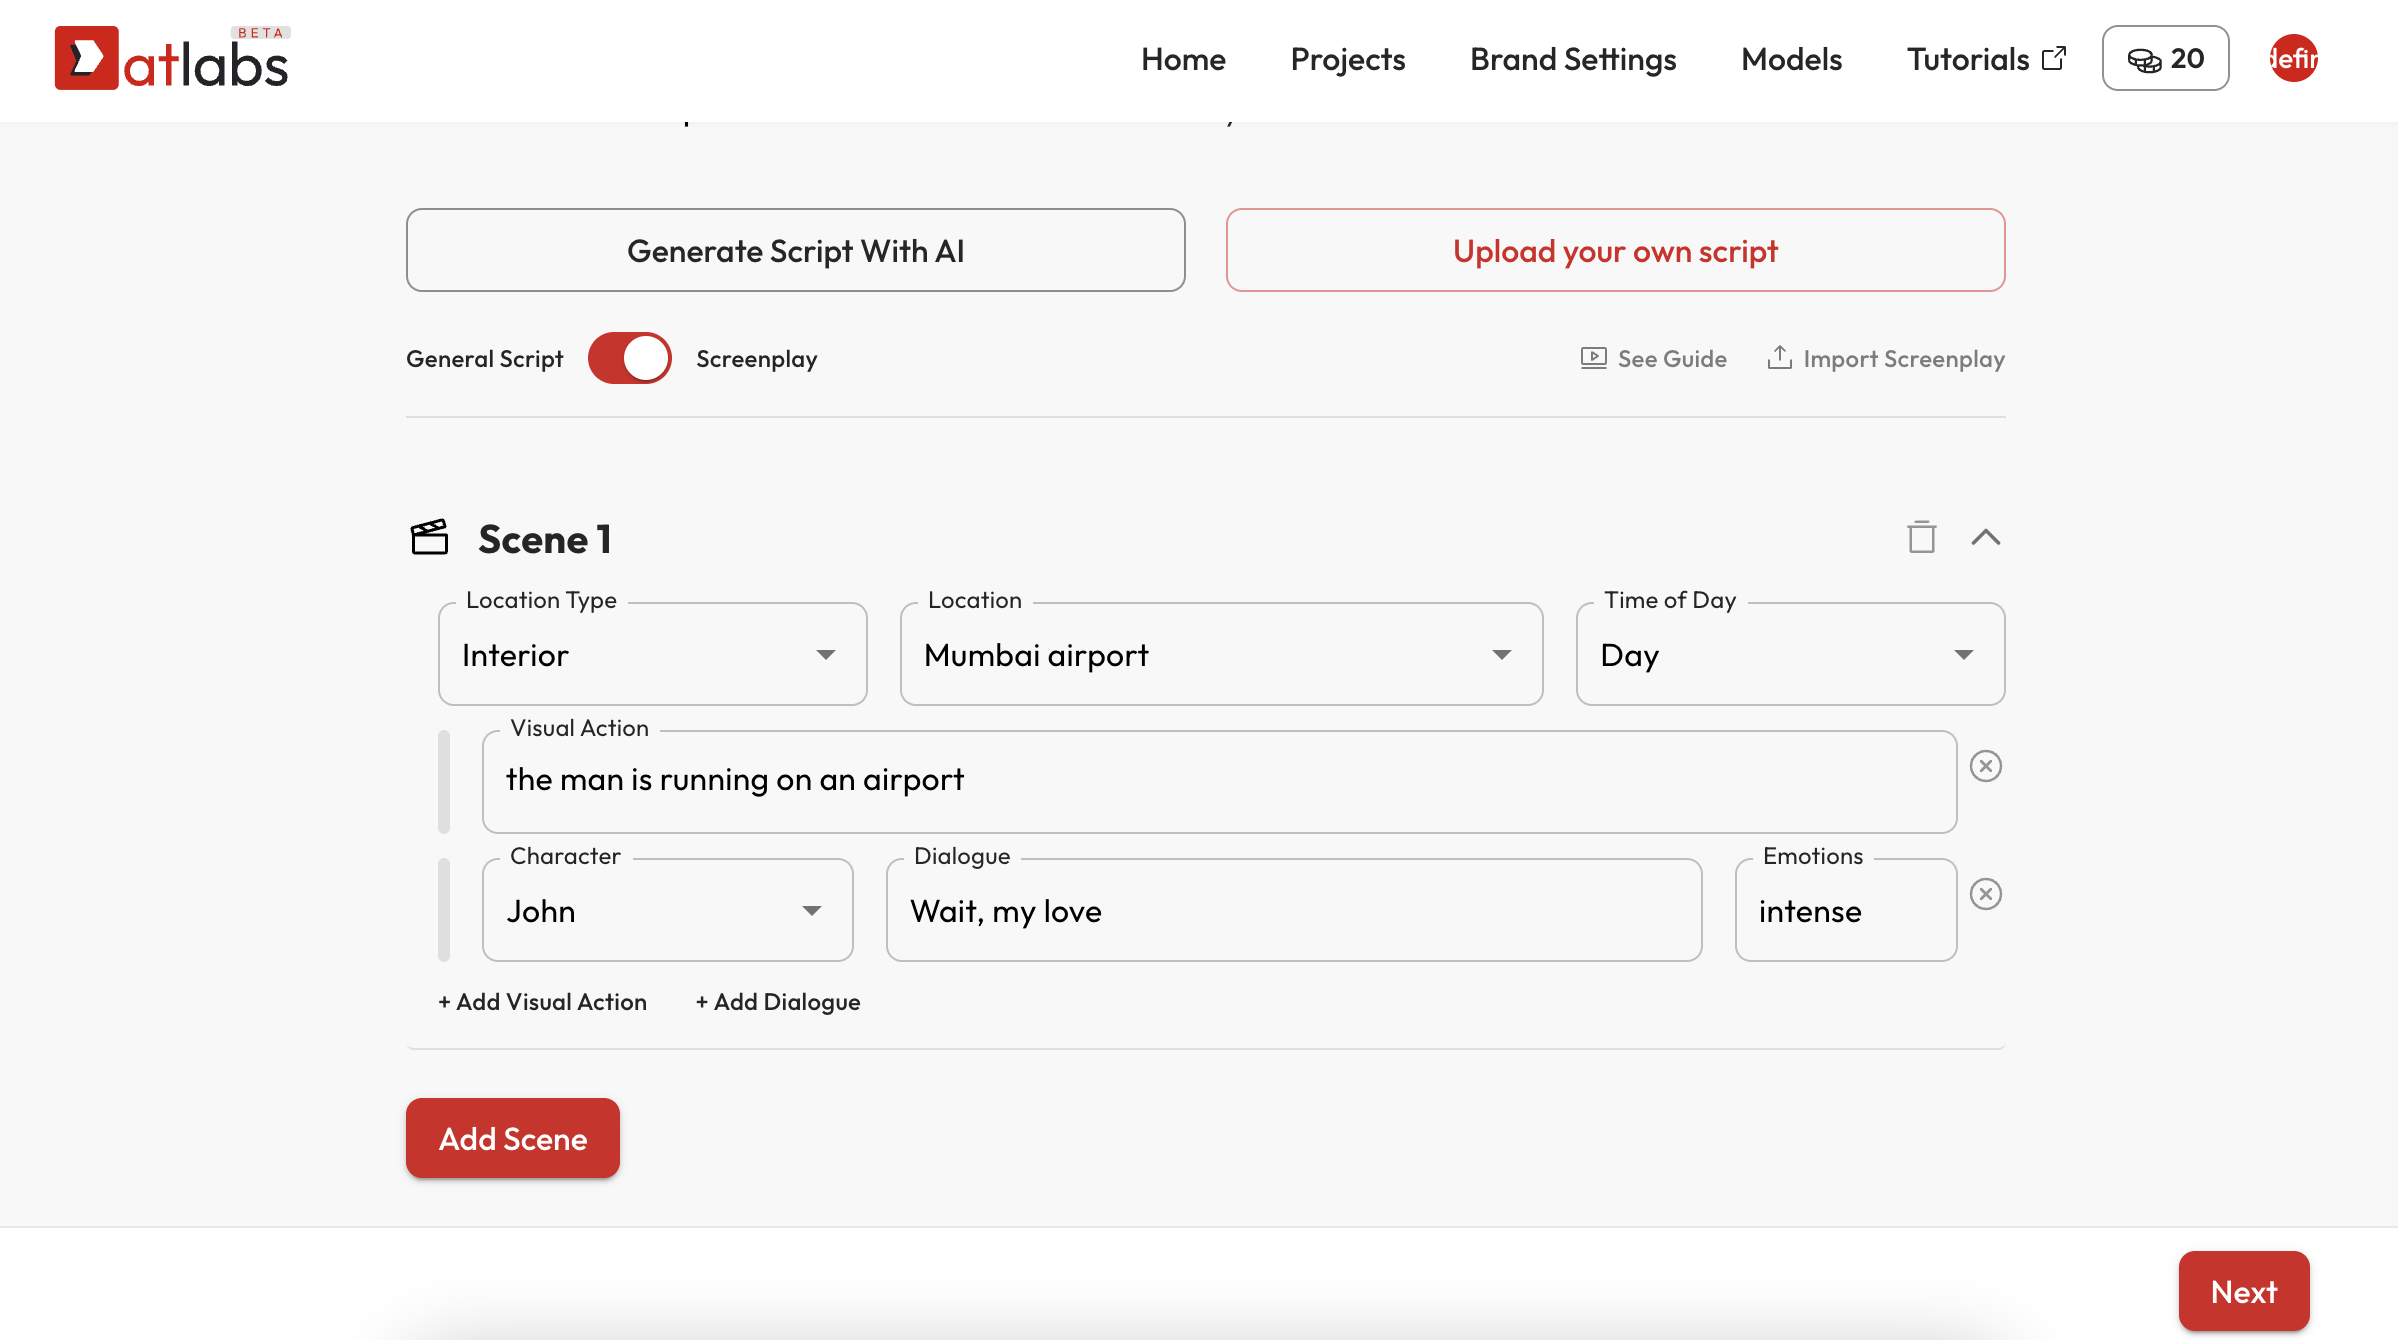
- Scene location type (Interior/Exterior)
- Specific location (e.g., Mumbai Airport)
- Time of day (e.g., Day, Night)
- Visual actions (e.g., “The man runs through a crowd”)
- Character + Dialogue (with emotion tagging)
- Add multiple scenes
- Add multiple characters per scene
- Define dialogue and emotion per character
- Set transitions through scene pacing