
Edit Timeline
⏱️ How do I use the scene timeline?
The timeline shows everything in a scene on separate tracks, so you can trim shots, line them up with the narration, fix captions and adjust audio in one place.
Open the timeline
- Choose Scene above the preview in Edit Video, or
- Click Open Timeline in the Settings tab, or
- Click Edit Timeline in the scene's ⋯ menu, or
- Click Edit in Timeline in the Captions tab.
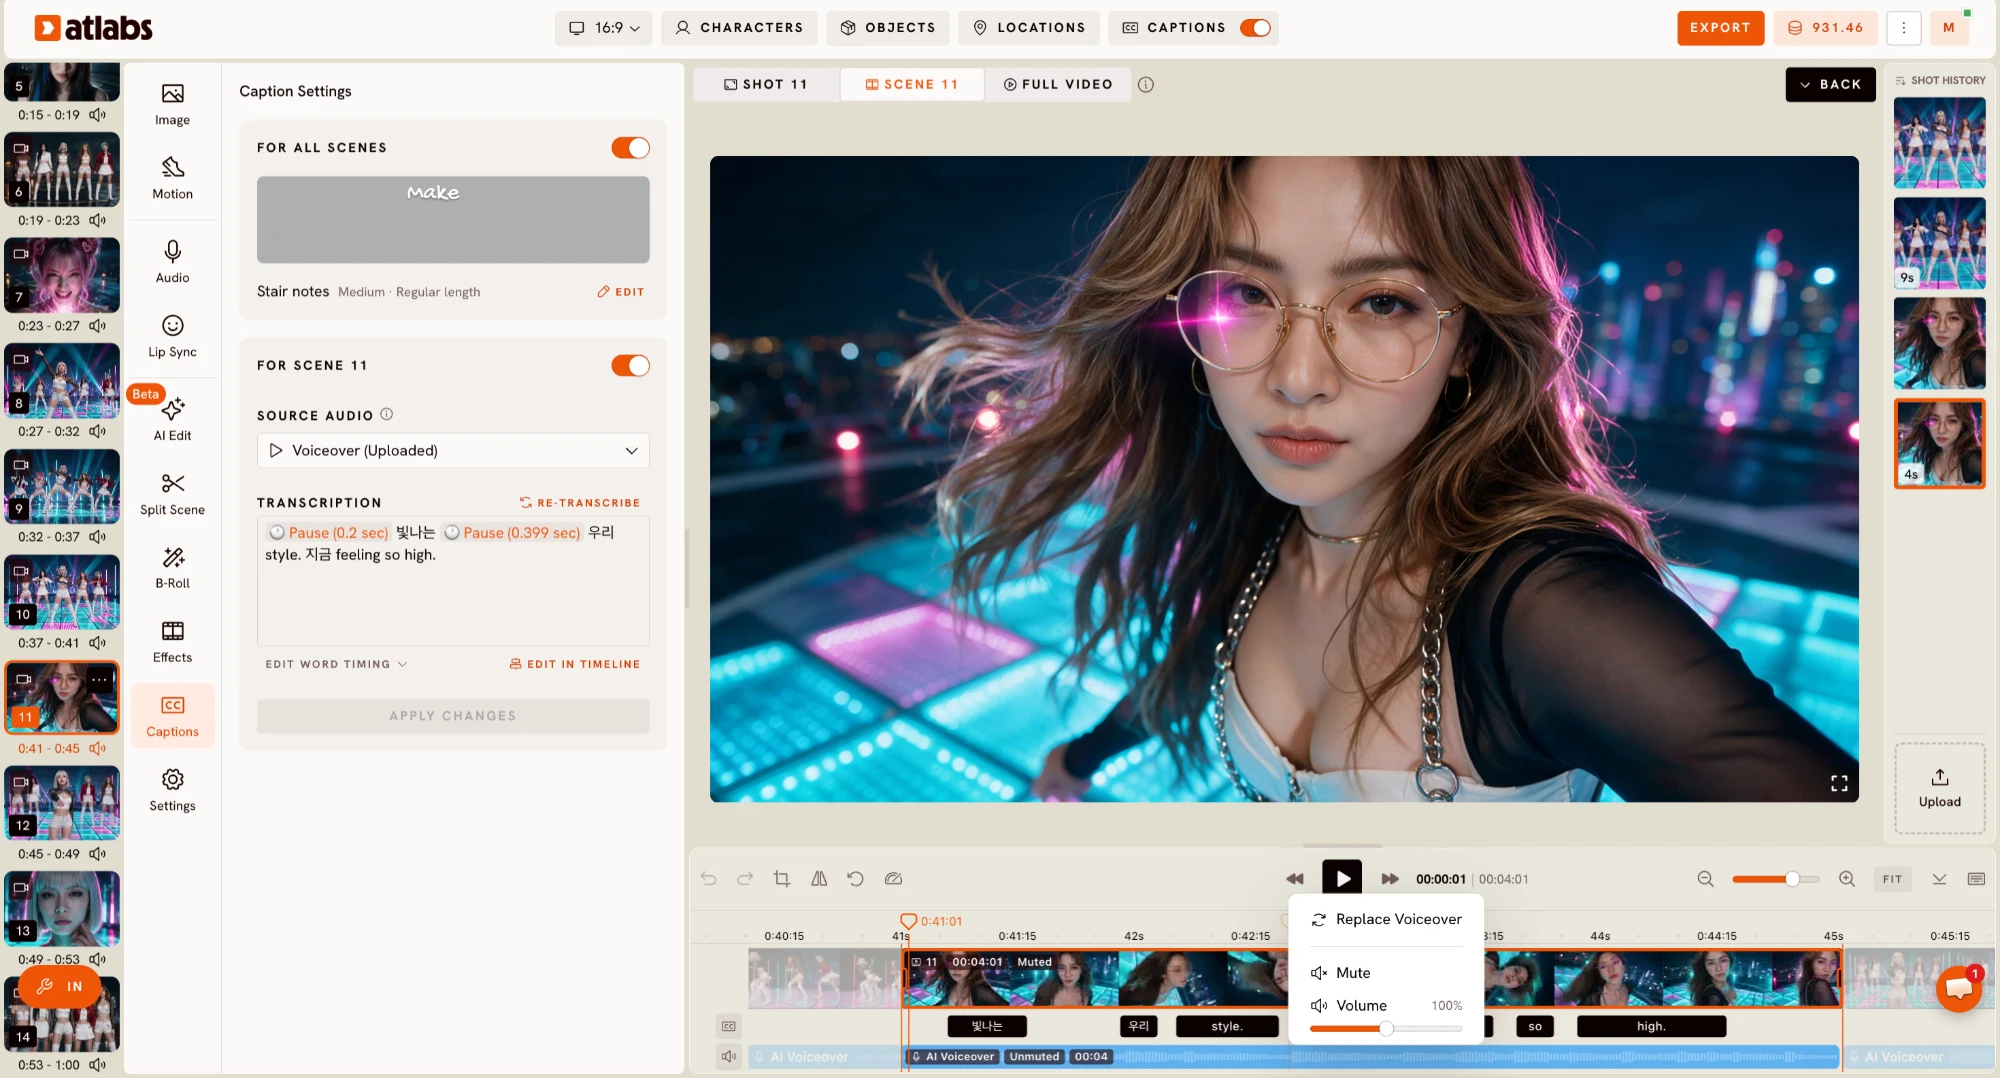
What's on the timeline
- Shot track: each shot in the scene, with its number and length. A Muted label means the shot's own audio is off. Drag a shot's edges to trim it.
- Captions track (CC): every caption word as a block, placed where it's spoken. Double-click a word to edit it.
- AI Voiceover track: the scene's narration, with its length and an Unmuted or Muted label.
- The speaker and CC icons at the start of the tracks mute the audio and show or hide captions.
Shot options
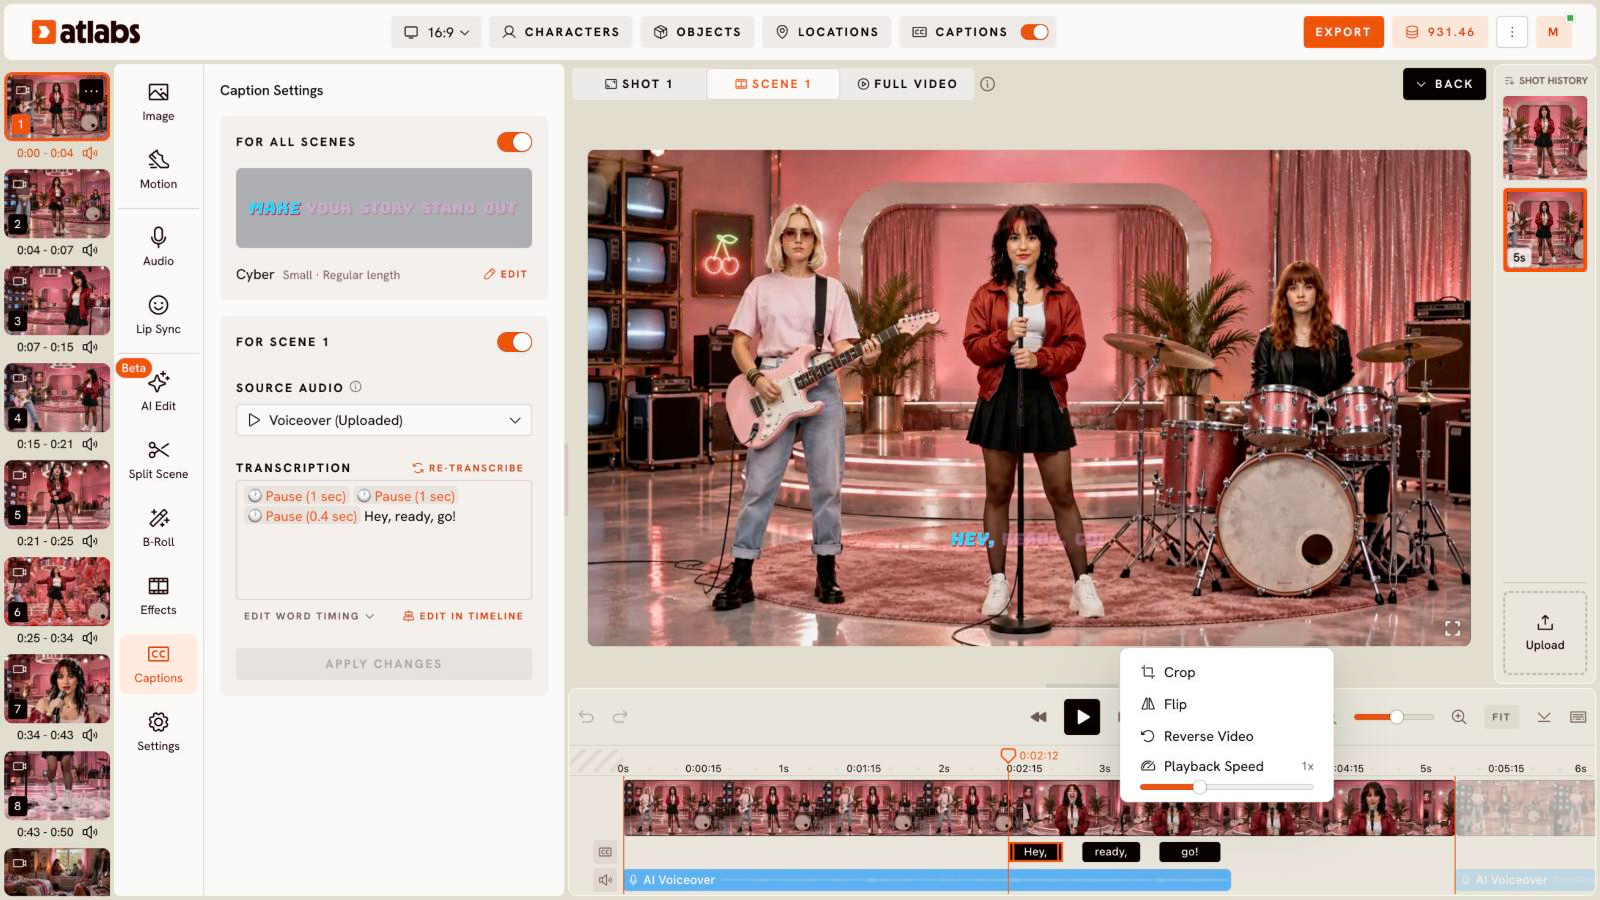
Right-click a shot on the timeline:
- Crop
- Flip
- Reverse Video (video shots only)
- Playback Speed, from 0.5x to 2x
Voiceover options
Right-click the AI Voiceover track:
- Replace Voiceover: swap in a new recording.
- Mute
- Volume, with a slider from 0 to 100%.
Toolbar
Undo and redo, crop, flip, reverse and playback speed act on the clip you select. In the middle are the play controls and the current time. On the right are zoom, Fit, hide timeline and the keyboard shortcuts list.
Keyboard shortcuts
- Space: play or pause
- ⌘ + scroll: zoom in or out
- Two-finger swipe: scrub across the timeline
- Double-click a clip: move the playhead
- ⌘Z / ⌘⇧Z: undo / redo
- ⌘C / ⌘V: copy / paste the selected B-Roll
- ⌥ + drag: ignore snapping
- ⌫: remove the selected gap, B-Roll or audio
- M: mute or unmute the clip
- F: flip the clip
- R: reverse the clip (video only)
- C: crop the clip
On Windows, use Ctrl instead of ⌘ and Alt instead of ⌥.
Updated on: 11/19/2026
Thank you!